Say Goodbye to Cakey Foundation! Here’s Why
Recognizing Cakey Foundation: Signs and Symptoms
Recognizing when foundation looks cakey is key to a flawless makeup look. Look for these signs on your skin; the foundation seems thick or like a mask, patches appear uneven or flaky, and makeup lines or creases become evident especially around the mouth and eyes. A mismatched shade can also give a cakey appearance and make your makeup standout instead of blending in. If you notice any of these issues, then you’re likely dealing with cakiness. Identifying the problem is the first step in correcting it. By being aware of these symptoms, you can take steps to prevent cakey foundation and maintain a smooth, natural complexion.
Common Causes of Cakey Foundation
Dealing with cakey foundation can be frustrating, but understanding what causes it can help you avoid this makeup mishap. There are several factors that might contribute to your foundation looking less than perfect:
- Excess Application: Applying too much foundation is a common mistake. Layering on foundation can make it settle into lines and amplify texture on the skin, leading to a cakey look.
- Incorrect Skin Prep: Skipping essential steps like cleansing, moisturizing, and priming can lead to uneven makeup application. Prepping your skin creates a smooth base for foundation.
- Dry Skin: If your skin is dry or flaky, foundation may not apply smoothly, resulting in a cakey appearance. Regular exfoliation and hydration are crucial to combat this issue.
- Wrong Foundation Formula: Using a foundation not suited to your skin type can cause issues. Oily skin might need oil-free formulas, while dry skin may require more hydrating options.
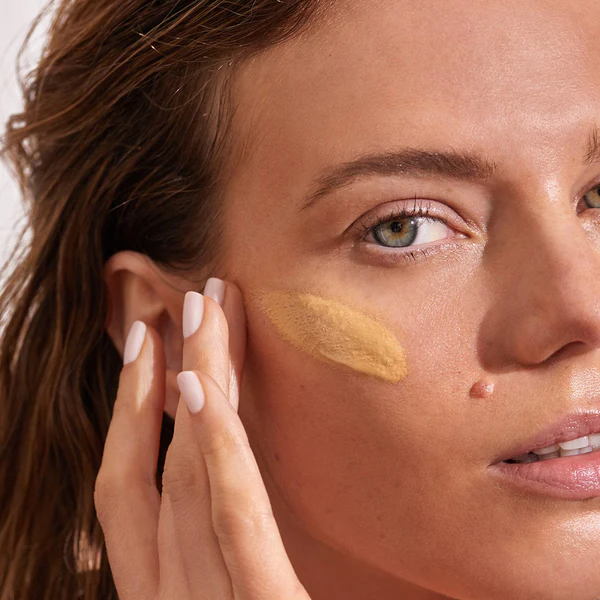
- Tools and Techniques: The tools you use and how you apply your foundation can make a big difference. Dirty brushes or incorrect application techniques can contribute to a cakey finish.
- Setting Powder Overload: Though setting powder helps makeup to last longer, using too much can suck the moisture out of your foundation, causing it to look dry and cakey.
By addressing these common causes, you can work towards achieving a smooth, natural foundation finish that complements your skin rather than concealing it under a heavy mask. Keep these factors in mind during your next makeup application for a truly flawless look.

Pre-foundation Rituals: Prepping Your Skin
Before foundation, skin prep is essential for a smooth finish. Start with a clean face, use a gentle cleanser to remove dirt and oils. Next, apply a good moisturizer to hydrate your skin. This step helps avoid flaky patches when you put on foundation.
Don’t forget to exfoliate regularly. It removes dead skin cells and makes your skin smooth. This way, your foundation won’t look dry or uneven. Two to three times a week is enough for most skin types.
A primer is your best friend. It creates a barrier between your skin and makeup. Primer smooths out pores and fine lines, helping foundation stay put and look less cakey.
Drink enough water too. Hydrated skin looks healthier and holds makeup better. Aim for eight glasses a day to keep your skin in top condition.
Lastly, give your skin a moment. After applying each product, wait a few minutes before the next layer helps them absorb properly. This prep routine can prevent that cakey look and give your foundation a natural, lasting finish.
Choosing the Right Foundation for Your Skin Type
Choosing the right foundation for your skin type can be the difference between a fresh, natural look and a cakey disguise. Here are some key points to guide you through the process:
- Know Your Skin Type: Determine if your skin is oily, dry, combination, sensitive, or normal. Each type will match better with specific foundation formulas.
- Oily Skin: Opt for oil-free, matte foundations to help control shine and oil throughout the day.
- Dry Skin: Look for moisturizing foundations with hydrating ingredients like hyaluronic acid to prevent flakiness.
- Combination Skin: Consider a balanced formula that offers hydration but also controls shine in oily areas.
- Sensitive Skin: Go for hypoallergenic and fragrance-free options to reduce the risk of irritation.
- Normal Skin: You can use a variety of foundations, but a lightweight formula works for a natural look.
- Check for Shades: Not only the formula, but the right shade is essential to avoid a cakey appearance. Test shades on your jawline to find a match that blends effortlessly into your neck and face.
By paying attention to these aspects, you can select a foundation that enhances your skin’s beauty without overloading it. Remember, the right foundation should be virtually invisible, offering coverage while still looking and feeling like your natural skin.
Application Techniques to Avoid Cakey Makeup
To avoid cakey makeup, follow these easy application techniques:
- Use Light Layers: Start with a small amount of foundation and build coverage as needed. Heavy layers often lead to cakeiness.
- Choose the Right Tool: Use a damp beauty sponge for a sheer, natural finish. For fuller coverage, choose a foundation brush but avoid overloading it with product.
- Blend Well: Spend time blending foundation into the skin. Pay attention to the hairline, jawline, and around the nose.
- Use the ‘Less is More’ Approach: Focus on areas that need coverage. Don’t apply foundation where it’s not needed.
- Avoid Excess Powder: Set your foundation with a light dusting of powder. Too much can make the skin look dry and cakey.
- Refresh With Mist: If makeup starts to cake, spritz some setting spray or hydration mist to revive it.
- Check Your Work: Step back and examine your foundation in different lighting to check for any cakiness.
By using these application techniques, you can say goodbye to cakey foundation and hello to a smooth, even complexion.

The Role of Tools: Brushes and Sponges
When it comes to a flawless foundation finish, the tools you choose are vital. Brushes and sponges can make or break the look of your foundation, influencing whether it appears cakey or smooth. Here are some insights into using these tools effectively:
Choosing Brushes and Sponges
- Type of Tool: For a sheer, dewy finish, use a damp beauty sponge. For more coverage without the cake, a stippling brush works well.
- Quality Matters: Invest in high-quality tools. They last longer and perform better, creating an even application.
- Keep Them Clean: Dirty brushes and sponges can harbor bacteria and cause breakouts. Regular cleaning ensures a better application and prevents skin issues.
Using Brushes
- Light Strokes: Use gentle, circular movements for buffing foundation into the skin. This blends the product seamlessly.
- Less Product: A brush can build coverage quickly. Use a small amount of foundation to avoid excess.
- Edge Softening: Always soften the edges to prevent noticeable lines, especially along the jawline and hairline.
Using Sponges
- Dampen First: Always dampen your sponge and squeeze out the excess water. This prevents the sponge from absorbing too much foundation.
- Dabbing Technique: Dab or bounce the sponge on your skin. This presses the foundation in, avoiding a heavy layer.
- Coverage Control: Use the pointed end for areas needing more precision. The broad side is great for larger areas.
In conclusion, whether you prefer brushes or sponges, remember that the key is in the technique: less product, good blending, and consistent tool maintenance. By mastering these aspects, you are set to achieve that coveted non-cakey, flawless foundation finish.
Post-Application: Setting Your Foundation
After applying your foundation, setting it properly can prevent the cakey look. Here are some effective ways to set your foundation:
- Use Setting Powder Sparingly: A light dusting is enough. Focus on areas that tend to get oily, avoid dry patches.
- Choose Translucent Powder: This kind doesn’t add color, prevents over-layering which can lead to cakeiness.
- Press, Don’t Rub: Use a puff or sponge to press the powder into the skin. Rubbing moves foundation around, causing buildup.
- Hydrating Mist is Key: A quick spritz after powdering can melt the powder into the foundation for a seamless finish.
- Check Your Application: Look at your makeup in natural light to spot any cakey areas.
- Blot Excess Oil: Use blotting papers. Press lightly onto oily spots. This can keep makeup fresh without adding layers.
By following these tips, you can lock in your foundation and keep your skin looking smooth and natural all day.
Troubleshooting: Quick Fixes for Cakey Foundation
Cakey foundation can feel frustrating, but don’t worry, there are quick fixes you can try:
- Hydration is Key: If your foundation feels heavy, apply a light moisturizer. This can refresh your skin.
- Blend Again: Use a damp sponge to gently press over cakey areas. Blending can fix the heaviness.
- Less Powder: If you’ve used too much powder, a damp sponge can help. Pat down the excess.
- Setting Spray Magic: A light mist of setting spray can soften the look. It merges layers.
- Check Products: Make sure your foundation and primer match. Oil and water-based products can clash.
- Exfoliate Regularly: Removing dead cells helps. Smooth skin makes foundation look better.
- Swap Tools: Change from a brush to a sponge for application. This can prevent cakiness.
- Touch-up: For oily areas, use blotting paper then reapply powder lightly.
- Mixing Technique: Mix foundation with a little moisturizer. It creates a tinted moisturizer for light coverage.
- Rest and Reapply: Sometimes, starting over is best. Cleanse, moisturize, and try again.
Remember, fixing cakey foundation often requires simple adjustments. Find the right routine for you, and you’ll achieve that perfect finish.